There’s a particular kind of frustration that comes with trying to fit a queen bed into a small bedroom. The bed isn’t the problem. You need the comfort and size, but once the bed is in the room, every arrangement looks wrong. The room feels awkward, cramped or poorly placed.
Most of the time, the issue is the layout. A queen bed measures 60 by 80 inches, which is generous but not unworkable even in small rooms.
The goal isn’t to just “fit” the bed. It’s to design the room so it becomes functional working space, with storage and style balance.
This guide breaks down the most practical small bedroom layout ideas for a room with a queen bed, along with what each one suits best, what doesn’t, and how to avoid common mistakes that make small rooms feel even smaller.
Does a Queen Bed Actually Fit in a Small Bedroom?
Before choosing a layout, it helps to know what you’re working with.
A queen bed needs a minimum of about 10 by 10 feet to fit physically, though that’s quite tight and leaves very little clearance on any side. A 10 by 12 foot room is much more workable, while anything above that gives you real flexibility for storage and flexibility.
A useful guideline is the 24-inch clearance rule. Try to maintain at least 24 inches of walking space on the sides of the bed you’ll use regularly. On the less-used sides like a wall side, you can have tighter spacing, sometimes as little as a few inches.
Knowing which sides need clearance and which don’t is really what makes most of the layouts below work.
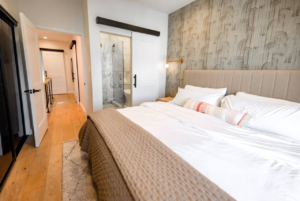
The Centered Wall Layout (Most Balanced Option)
This is the most common and visually balanced layout.
The bed is placed against the center of the longest wall, with space on either side. It works best in square or or slightly rectangle rooms where symmetry is possible.
This layout naturally allows:
- Matching nightstands on both sides
- A clean, intentional focal point
- Easier styling and symmetry
The mistake people most often make with this layout is pairing it with oversized furniture. If you have a queen centered on the wall and then put a six-drawer dresser against the opposite wall, the room starts to feel narrow and overcrowded.
The centered layout works best when the other furniture stays low, minimal, or is built into the walls entirely. Slim bedside tables, floating nightstands and narrow vertical dressers will work well with this layout.
The Corner Tuck Layout (Best for Maximum Floor Space)
In this layout, the bed is pushed into a corner, with one side against the wall. This frees up significant floor space and improves movement in a small room. Instead of clearance on three sides, you only have it on two, which makes the room feel noticeably more open.
This layout works especially well for solo sleepers or compact rooms where space is limited.
The challenge here is that the layout can look visually unfinished if you don’t style it intentionally.
The wall side of the bed tends to feel bare and a little awkward, so it helps to add a gallery wall or a single oversize piece of art above the tucked side. Use pillows and a throw to make the corner feel cozy rather than forgotten. Consider a headboard that spans from one wall to the other to tie both surfaces together visually.
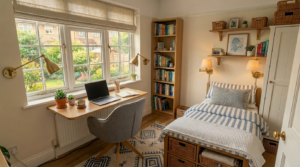
The Window Wall Layout (Most Underrated Space Saver)
Placing the bed under or alongside a window is often avoided, but it’s one of the most space-efficient layouts in a small bedroom.
When the bed sits on the window wall, it frees up the longer walls for storage, a desk, wardrobe, or open walking space. The room tends to feel less blocked and more balanced as a result.
The main consideration here is light control and headboard height. If the bed goes directly under the window, you’ll want blackout curtains that hang wide enough to frame the bed rather than just the window, along with a headboard that sits below the sill.
The Floating Bed Layout (For Slightly Larger Small Rooms)
A floating layout means the bed isn’t touching any wall. It sits instead with clearance on at least three sides, sometimes all four.
This is not suitable for very tight rooms because it will make things feel more cramped. However in a 10 by 12 or slightly small but proportionally balanced room, it creates a more intentional and styled look without surrounding space feeling leftover or awkward.
The reason it works is largely visual. A bed with a little breathing room on all sides becomes a deliberate centerpiece, which actually makes the room feel less chaotic.
Minimalist bed frames, platform beds and low profile mattress bases tend to work best as visual anchors in this type of layout.
What to Put on Each Side of the Queen Bed
Nightstands are one of the biggest sources of visual clutter in a small bedroom, mostly because people default to freestanding tables that take up floor space the room doesn’t have.
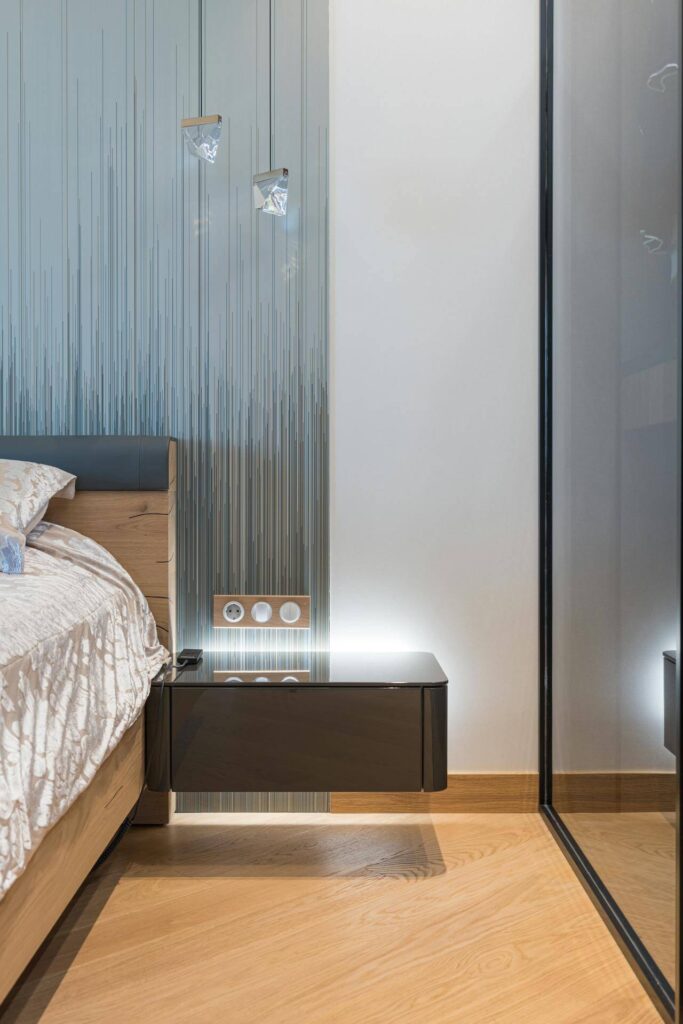
Wall-mounted shelves or floating nightstand shelves are almost always the better choice in a tight room. They give you the same function without occupying any floor space at all. A single shelf on each side, installed at mattress height, keeps things clean and open.
If you prefer a freestanding piece, look for something narrow and tall rather than wide and low. A small side table with a single drawer and a slim profile takes up far less visual weight than a standard two-drawer nightstand, even if the physical footprint isn’t that different.
In very tight spaces, particularly with a corner tuck layout, it’s acceptable to have only one nightstand on the open side instead of forcing symmetry.
Storage That Works With Small Bedroom Layouts
Storage should support the layout, not compete with it.
Under-bed storage works with almost every layout and is one of the most effective ways to reclaim unused space in a small bedroom. Bed frames with built-in drawers are the tidiest option.
If you’re using bins or boxes instead, keeping them consistent in size and style makes the space feel organized rather than chaotic.
For dressers, placement matters just as much as size. Narrow or tall dressers work better than wide horizontal ones in most small bedrooms.
An ottoman or storage bench at the foot of the bed can also double as seating and hidden storage if the space allows.
Common Layout Mistakes That Make a Queen Bed Feel Overwhelming in Small Bedrooms
Some layouts fail not because of size, but because of poor placement decisions.
1. Using the wrong wall for the bed
Placing the bed on the short wall in a narrow room leaves you with awkward space on either side and a long empty stretch of room beyond the foot of the bed. Placing the bed on the long wall instead, usually opens up the room considerably.
2. Blocking the door path
A door that swings open and hits the furniture or bed, or nearly does, creates a pinched entry that sets a cramped and dysfunctional tone for the whole space. Before committing to any layout, check the door clearance first.
3. Overfilling all wall spaces
Putting furniture against every wall make the center feel like a leftover gap rather than a functional space. That makes the room feel boxed in. Leaving at least one wall relatively clear, or using it for something low and visual rather than tall and blocky, tends to make the room feel more open overall.
Finding the Layout That Works for Your Room
No single layout works for every bedroom. The right choice depends on your room’s specific proportions, where the windows and door sit, and how you actually use the space day to day.
What matters most is not forcing symmetry or filling every wall. It is about creating enough clearance and visual balance so the room feels usable. Because, the underlying principle that holds across all the layouts is: a well-arranged queen bed in a small room will always feel better than a smaller bed in a poorly arranged one.